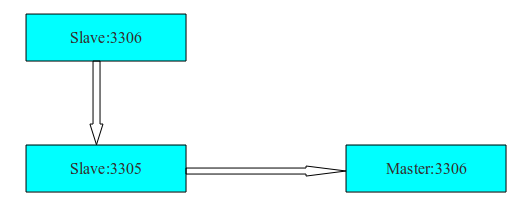
Installation/Configuration of Saturn (mysql slave)
-
yum install -y mysql-server
-
Update the following values in /etc/my.cnf
-
server-id = 2
-
start the mysql server
-
-
Export the db dump.
-
cat universe.sql | mysql
-
-
Configure SSH Tunneling. Here, we will use a local user account
-
adduser sqltunel
-
su – sqltunnel
-
ssh-keygen -t rsa
-
Create a user account named sqltunnel in master server and copy the public key from slave to authorized_keys of master.
-
Verify the ssh connectivity and confirm that you are able to login without password
-
Lets create the ssh tunnel from slave server
-
ssh -f <master-ip> -L 3305:127.0.0.1:3306 -N
-
-
Now, the port 3305 in slave is actually, the port 3306 in master server.
-
Lets verify mysql connectivity
-
mysql -h 127.0.0.1 -P 3305 -u dbuser -p
-
-
Once its verified and confirmed that mysql ssh tunnel is working, lets move onto completing the final steps of replication.
-
Login to mysql and configure the master server details. Execute the mysql command
-
CHANGE MASTER TO MASTER_LOG_FILE='mysql-bin.000001', MASTER_LOG_POS=103, MASTER_HOST='127.0.0.1', MASTER_PORT=3305, MASTER_USER='replication', MASTER_PASSWORD='slave';
-
MASTER_LOG_FILE and MASTER_LOG_POS -> the value is from the output which you got from master when you type “show master status”
-
mysql> START SLAVE;
-
Verify Mysql Replication status in slave server
-
mysql > show slave status\G
-
It should give you output “Yes” for Slave_IO_Running and Slave_SQL_Running.


